neat image noise reduction
 I continue to be inspired by Picasa to work with photographs. I like my Casio EX-Z40 because it is slim enough to actually take with me, but one of its weaknesses is that it is not a great low-light camera. At ISO 200 and higher, quite a bit of noise is introduced into photographs, a problem shared by many compact digital cameras no matter the resolution of their CCDs.
Noise tends not to be as visible in prints, but it is very apparent when viewing full screen on monitors. One way to reduce noise is to apply noise filters in Photoshop. Combined with the Magic Wand selection tool, this is a good way of cleaning up the picture. It is also time consuming and expensive. Fortunately, there is a cheaper and more powerful alternative: Neat Image.
 Neat Image comes in a variety of editions, but the $29.00 Home edition or the free Demo edition should be perfect for all but the professional. The Demo is especially attractive as it is fully featured and not time constrained. Its single limitation is that it only saves in High quality JPEG format. For me that means that my normally 2MB photo files are compressed to 1MB after Neat Image processing.
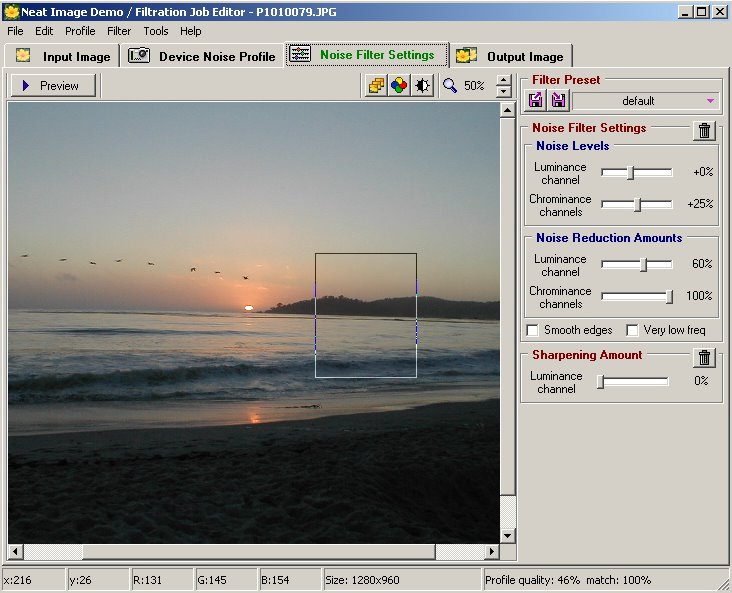
To get started, install and then open a photo you wish to clean in Neat Image. Neat Image will read the EXIF data and you can either apply a standard setting for your camera, or, better yet, select a noisy 100x100 background area to generate custom settings for that picture. On the 3rd tab, select a test area and Preview the noise reduction. Simple sliders on this tab let you control the results, or you can switch to Advanced for a wide assortment of options. The goal is to take away as much noise as possible while preserving details. When you are happy with your results, switch to the Output tab to save a copy of your image. The entire sequence takes about 3 minutes an image.
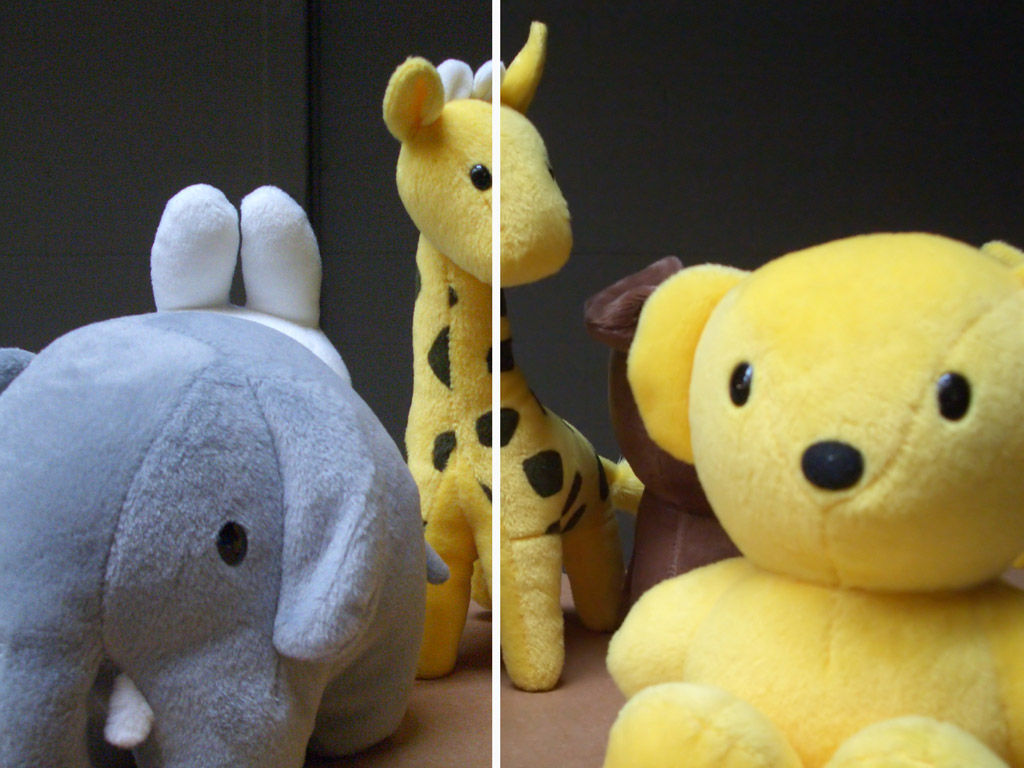
 How well does it work? You can judge for yourself using my test images, but I am quite impressed. I think that I made big improvements with very little effort, and I can’t wait to see what happens when I actually know what I am doing. Picture 1 (the split screen above left) shows the before image on the left and the cleaned image on the right. To get the best sense of the improvement, look on either side of the giraffe’s next. On the right the artifacts are gone but the detail remains.
In picture 2 (above right), the box insert is from the cleaned output while the surrounding areas are from the original. This was an extremely low light picture, but Neat Image was able to make large changes. The pillows and cushions are most dramatic.
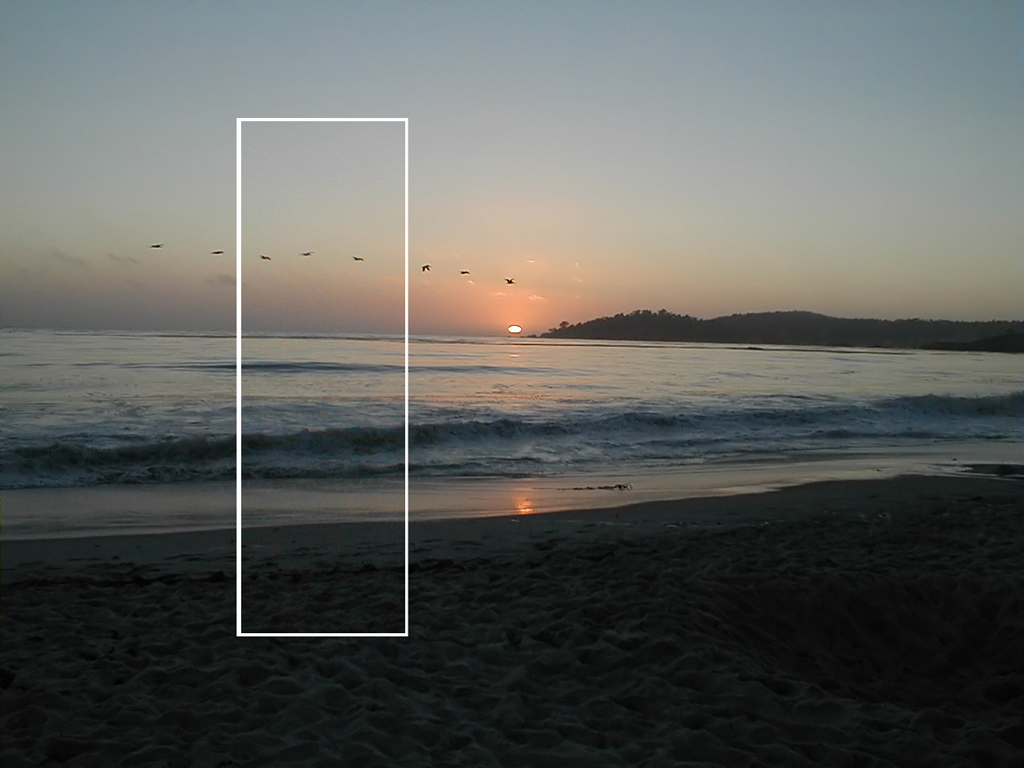 In picture 3 (left), the sunset, the entire image has been processed but the original noise has been added in the box. Look at the sand, the edge of the water and the start of the horizon.
Download the free Neat Image Demo and give it a try. That’s what I did late last night to touch up the Vbar photos and I couldn’t be happier. I may buy the Home edition to support the smart people who wrote the software, but the Demo more than meets my needs.
Bonus resource: a comprehensive review of more than 20 professional noise reduction packages. Guess what? The reviewer loves Neat Image
posted by paul @ 6:04 PM
0 comments
![]()
![]()

0 Comments:
Post a Comment
<< Main page